This caresheet version is the shorthand 'tell me what I need' version to create a simple, successful set up for your leopard gecko. This is a basic, beginner oriented list for a clean set up. Examples are some options that you can look up. We have no affiliation with products mentioned here.
What you Need:
Enclosure
20 Gallon Long Tank with Screen Lid/
OR (Easiest Care) Front Opening Equivalent Terrarium (Example: Zoo Med or Exoterra)
Heat Source
Heat Pad to cover roughly 1/3 of the enclosure bottom (Example: Ultratherm)/
OR Ceramic Heat Emitter with dome
Heat Control
Thermostat for Heat Pads (Example: Herpstat (Better), JumpStart (Cheaper) OR Dimmer for CHE
Hides
Cool Hide
Warm Hide
Humid Hide (Tupperware, Jar, Cave Hides)
Moist Hide Substrate (Moistened Eco Earth, Coco Fiber, Moss, Paper Towel)
Substrate
Paper Towels or Shelf Liner (no adhesives)
Bowls
Calcium/Vitamin Bowl(s) (Bottle Caps, etc)
Food Bowl (Worm Bowl w/rim to avoid escapes)
Supplements
Calcium w/D3 (Osteoform SA)
Vitamins (Ex: Vionate, Reptivite)
Safety Monitoring
Infrared Temperature Gun
We don't suggest buying reptile kits as they usually have things you don't need and/or substandard equipment. Instead, we suggest that you take the time to collect the items that will be the best fit for you and that will be useful and last longer.
Step 1: Choose a location for your tank that is stable, away from drafts and safe from other pets. If you have cats, I suggest you try to keep them away and invest in screen clamps for added protection to lower the chance of accidents.
Step 2: If using a Heat Mat, test it and the thermostat to ensure that they work correctly. Then stick it to the outside underneath the tank to one side. If using one that is not sticky, aluminum tape is recommended to accomplish this. Use the tape to also tape the thermostat probe to the heatmat itself, not inside the tank.
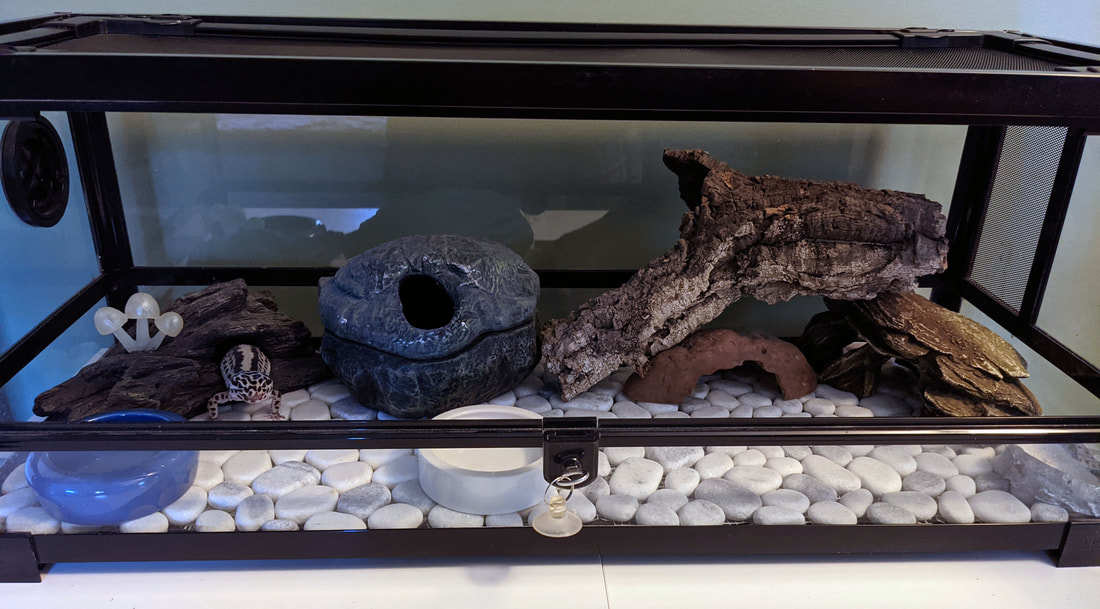
Step 3: Situate your interior. The substrate should cover the bottom of the terrarium. The warm hide should be over the heat pad, the humid hide should at least be partially over the heat pad area, as well. The cool hide will be on the other side of the tank, away from the heat pad area. We suggest that the three main hides be dark hides, encloses on at least three sides, usually with a size appropriate hole to enter, or situated in a way that creates a safe enclosed, dark shaded spot as this is what your gecko will want. Other more open hides can be used as added decor and climbing space for your gecko. They might appreciate reptile safe artificial plants, hammocks, cork flats, etc.
Step 4: Double Check Everything. Get your tank running and check floor/basking surface temps to ensure they're 90-93F. Check the surface with the infrared temp gun, don't rely only on the thermostat. Your thermostat will read the pad temperature, so you may have to set it higher to gain a stable, proper temperature through the terrarium floor.
Check all of your hides and decor. Make sure that none of it is unstable or at risk of falling. Your gecko will be climbing on everything, you don't want something to fall on them.
Step 5: Wait! Don't put any animal in right away. Preferably, check your surface temperatures a few times a day for a few days to ensure that everything is stable and correct for your pet.
Step 6: Put your calcium/vitamins in the tank. Moisten the substrate in your humid hide - it should be moist, but with no standing water. Triple check that everything is right.
Step 7: Your gecko will not know you or its new home. It will likely be scared and stressed. For glass tanks/terrariums, we highly suggest using cardboard or something similar to cover at least three sides of the enclosure for a few weeks while they settle in and get used to the new activities, sights and smells and you!
Step 8: The most important, and probably hardest, bit! Once your gecko is in its new home, leave them be for at least a week. Try not to peek in too much and don't open or reach into the enclosure except for routine maintenance. Don't try to feed them for at least a few days. Then you might try to wriggle a feeder on a tong, but if they don't come out, don't try to force them.
They are very likely not going to eat for a while due to stress, so we don't recommend using crickets (if you plan to) at this point. Worms are easier and can be placed in the bowl for the gecko to eat if they want to at night when they're more likely to come out.
Step 1: Choose a location for your tank that is stable, away from drafts and safe from other pets. If you have cats, I suggest you try to keep them away and invest in screen clamps for added protection to lower the chance of accidents.
Step 2: If using a Heat Mat, test it and the thermostat to ensure that they work correctly. Then stick it to the outside underneath the tank to one side. If using one that is not sticky, aluminum tape is recommended to accomplish this. Use the tape to also tape the thermostat probe to the heatmat itself, not inside the tank.
Step 3: Situate your interior. The substrate should cover the bottom of the terrarium. The warm hide should be over the heat pad, the humid hide should at least be partially over the heat pad area, as well. The cool hide will be on the other side of the tank, away from the heat pad area. We suggest that the three main hides be dark hides, encloses on at least three sides, usually with a size appropriate hole to enter, or situated in a way that creates a safe enclosed, dark shaded spot as this is what your gecko will want. Other more open hides can be used as added decor and climbing space for your gecko. They might appreciate reptile safe artificial plants, hammocks, cork flats, etc.
Step 4: Double Check Everything. Get your tank running and check floor/basking surface temps to ensure they're 90-93F. Check the surface with the infrared temp gun, don't rely only on the thermostat. Your thermostat will read the pad temperature, so you may have to set it higher to gain a stable, proper temperature through the terrarium floor.
Check all of your hides and decor. Make sure that none of it is unstable or at risk of falling. Your gecko will be climbing on everything, you don't want something to fall on them.
Step 5: Wait! Don't put any animal in right away. Preferably, check your surface temperatures a few times a day for a few days to ensure that everything is stable and correct for your pet.
Step 6: Put your calcium/vitamins in the tank. Moisten the substrate in your humid hide - it should be moist, but with no standing water. Triple check that everything is right.
Step 7: Your gecko will not know you or its new home. It will likely be scared and stressed. For glass tanks/terrariums, we highly suggest using cardboard or something similar to cover at least three sides of the enclosure for a few weeks while they settle in and get used to the new activities, sights and smells and you!
Step 8: The most important, and probably hardest, bit! Once your gecko is in its new home, leave them be for at least a week. Try not to peek in too much and don't open or reach into the enclosure except for routine maintenance. Don't try to feed them for at least a few days. Then you might try to wriggle a feeder on a tong, but if they don't come out, don't try to force them.
They are very likely not going to eat for a while due to stress, so we don't recommend using crickets (if you plan to) at this point. Worms are easier and can be placed in the bowl for the gecko to eat if they want to at night when they're more likely to come out.
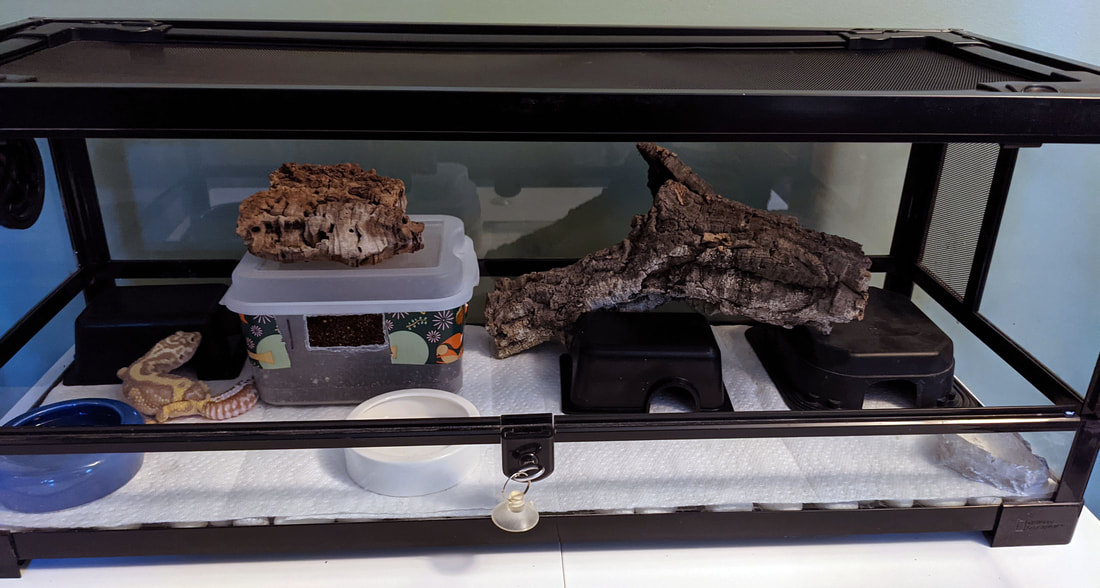
This set up is using low cost hides that still meets the gecko's needs without paying more for expensive hides.
Example Maintenance:
Spot Clean Daily, Preferably
Change Water and Wash Water Bowl Daily
Feed Your Gecko LIVE Food 3-4 Times a Week for Young Juvis, 2-3 Times a Week for Adults
(Notes: If you're using a worm bowl, you can add worms 1-2 times a week and let them self regulate as long as they are not overweight)
Refresh Supplement Powders Weekly
Change Substrate (Paper Towels) and/or Ensure All Waste is Completely Removed Weekly
Check Surface Temps at Least Once a Week
Change Moist Hide Substrate Once a Month